Happy hump day! Welcome to Part 2 of my ‘mini-series’ on quick spray painting projects. Can you hear the cheesy soap opera theme music?!
Yesterday I posted about the hanging candelabra that started out as a thrift store table top candelabra which I painted and hung from the ceiling…and so today, the spray paint fun continues with my easy breezy shabby kitchen sign.
This sign took one and half hours to make and a whole hour of that was dry time!
I’d been rearranging this old shabby chic style shelf I have up in my kitchen (actually it’s a kitchen/dining room combo) on and off throughout the afternoon; pulling stuff off of different areas in the house until it was perfect (I do this a lot. A LOT!)
After setting up plates, small bowls, and candleholders, I still couldn’t figure out what was ‘missing’. Then it hit me! It needed something made out of wood and it must be dark and have a rustic feel. Nothing in the whole house fit the bill.
So I went out the garage to look through my reclaimed wood stash and found this beauty:

A simple remnant piece of wood that was almost a perfect cut, yet fell beautifully short, making it a great candidate for this shabby-rustic project.
After I smoothed it out lightly with my sanding block, it was ready for some paint.
Naturally I took out a left over can of black spray paint (Rustoleum Black-Satin finish) and sprayed in short bursts; top to bottom and side to side until it looked like this:

See how imperfect it was? The wood is so raw and natural that it soaked up the paint in some parts more than others. I was falling in love with it more and more as this process continued!
I let it sit outside for about an hour-which was more than enough time to allow it to dry thoroughly.
Then brought in the house to add the littlest word, that has the biggest impact:
Appropriate, wouldn’t you agree?
As I do quite a bit, I used vinyl letters to create the wording on this sign. Only problem was that I had run out of “E’s” and found myself having to improvise.

Funny how one wee letter can change the word ‘eat’ to the word ‘fat’. Hmmm, food for thought–pardon the pun!
I used my favorite brand of painting pen, Elmer’s (no endorsement here, I just love it!), to trace the outside of the vinyl letters (which are just stickers really), then peeled them off right away, and filled in the rest with the pen. Simple! And yes the brand you use is important. I tried a cheaper paint pen once and although a major brand, it was no good at all!

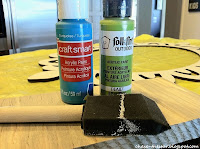
Here is what I ended up with after filling in the lettering. Loving the variation in the wood! This was not enough to make me happy though. I found some green acrylic paint in my supply closet from the Easter Wreath project that I made a few weeks ago…
..and with my finger I just slapped it on to the sides of the sign, and made sure it bled a little on to the front. After about 5 minutes it was dry and I went over the whole thing with the sanding block to make it look worn and faded, and to blend the green paint in-so that it looks like it perhaps was once all green? I don’t know, but it looks older than the hour it took to make, so it works for me!

I had every item needed to make this project in my supply closet, saving time and money, however if you need to go out and buy them, here is some pricing:


Couldn’t have been any easier, and affordable!
There ya’ have it! Two easy spray paint projects that you can whip up on a weekend afternoon!
Love, Barbara
Join me at these FABULOUS link-up parties!![]()

















sara @ applestone drive says
Wow, such a cool sign. I love the touch of green you added. Where did you buy your vinyl letters?
Chase the Star says
Sara, I got them at Michael’s! They sell a variety of sizes. I also got a pack at Walmart of 2″ skinnier letters for like $3. Great mini investment since if you peel them off carefully you can reuse them.
Thanks for stopping by and for the follow! Have a great day!
-Barbara
Gail Purath says
Great job..funny about fat and eat : )
I like it and how you’ve displayed it.
Chase the Star says
Thanks Gail! So very sweet of you to say and to stop by!
Barbara
A Brit of HAPPINESS says
Hey Barbara, your site is so cute! I am your newest follower ;)
Chase the Star says
Aaaww thanks! Thanks also for stopping by!
Barbara
Carolyn says
Your sign and shelf are just too darn CUTE! I love the simplicity of it. I’m a new follower :)
Carolyn
{my simple messterpiece}
Chase the Star says
Carolyn, thanks for saying that and for following! Have a great day!
Barbara
All Things Chic 2 says
Don’t you just love with what you can do with just a piece of wood!!!Love your sign, your newest follower, I invite you to visit my world as well…
Blessings Lori
Chase the Star says
Lori, Thanks for stopping by and for the follow! I’m on my way to check out ‘your world’ now!
Blessings to you as well!
Barbara
Becca @ The Sassy Penguin says
Such a cute little sign. I’m a new follower :)
Chase the Star says
Thanks Becca! Appreciate you stopping by and the follow! Have a great weekend!
Barbara
Sarah @ Imperfect Patina says
Thanks so much for stopping by my blog and commenting on my stools! I love this sign. I have been wanting to make one for awhile now! I am your newest GFC follower! Sarah
Chase the Star says
Thanks for the compliment and for dropping in Sarah! Also thanks for the follow!
Happy weekend to you!
Barbara
Maria says
What a great sign!!!! I’ve been wanting to make one of these for my kitchen too, but haven’t gotten around to doing it yet! I love yours, it’s great!!!!
Chase the Star says
Thank you Maria! Would love to see how yours turns out!
Barbara
Green Willow Pond says
I love fun, easy projects like this. Your sign turned out really cute!
Have a great weekend!
Deborah
Chase the Star says
Appreciate it Deborah! Thank you for the visit!
Have a lovely weekend!
Barbara
Ruth says
I love your sign. It looks perfect with your other accesories. It’s perfect.
Heading over to see your chandelier.
Ruth
Chase the Star says
Ruth, thanks! Have a wonderful weekend!
Barbara
gail says
Love your EAT sign… funny about the e/f. Just that one little “leg” changes everything!
gail
Chase the Star says
Thanks Gail! I never realized the letter thing until I made this sign!
Barbara
Jen-CraftOManiac says
I love the chunky shabby EAT sign. SO CUTE! That rainbow pic. you got too is great. winks, jen
Chase the Star says
Jen, Thanks!! Appreciate you coming by!
Barbara
Bonnie and Trish @ Uncommon says
I love your little sign! It really finished off the shelf perfectly, too! Thanks so much for sharing with us this week!
Take care,
Trish
PS… I have never thought about eat and fat being just one line apart.. hmmm….
Chase the Star says
The Eat and Fat thing really got me thinking!! Thanks for hosting!!
Barbara
Kyra says
Thanks for the how-to. I love this sign.
New follower from TJ
kyra @ caramelpotatoes.com
Chase the Star says
Thank you Kyra! Really grateful you stopped by!
Barbara
Richella says
Love your “Eat” sign! I really like the way you added the green to the edges–that was a great touch, especially with the distressing you added later.
I’ve never seen those vinyl letters–I need to look for them! In what part of Michael’s did you find them?
Thanks so much for joining Grace at Home! I really appreciate it.
Chase the Star says
Richella, I actually had to ask for them at the store..they were near the paint pens and acrylic paint at my local Michael’s..hope that helps! Thank you for dropping by! I love Grace at Home!
Phantastic Phinds says
just love this, simple & adds so much to the display. this is a must duplicate!
Chase the Star says
Thank you!! Would love to see yours if you duplicate!
Barbara
Tricia says
Very cute! And it looks great on your shelf!
makingitfeellikehome.blogspot.com
Chase the Star says
Thank you, thank you Tricia!!
Barbara
Katherines Corner says
Perfect! well done. Thank you for linking up to the Thursday hop. Sorry I’m behind in saying thank you. My Monday post will explain my delay.Hope to see you again this Thursday. xo
Carrie @ My Favorite Finds says
Featuring this next week on Handmade Tuesdays :)
Chase the Star says
So cool! Thank you Carrie!! You made my week:) Have a great one!
Jill ~ Jillify It says
Just a note to let you know that you have been featured on Jillify It!! Congratulations! :)
Jill
http://www.jillifyit.com
Chase the Star says
Thank you Jill!! So exciting! Woo hoo!