Thanks to Michaels for sponsoring this post!
We don’t start school for another month, but it’s never too early to get ready for it. I have been clothes shopping, errand running, and project planning in preparation for the big day. Today I decided to get a little crafty (cause that’s what I do!) and make a cute Notebook Frame to show off the first day of school pics!
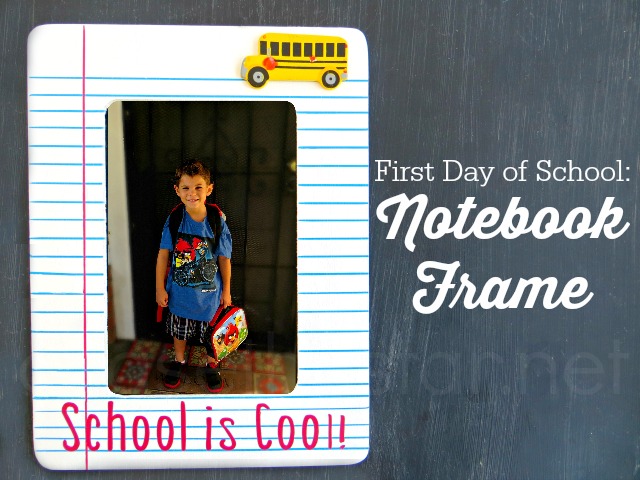
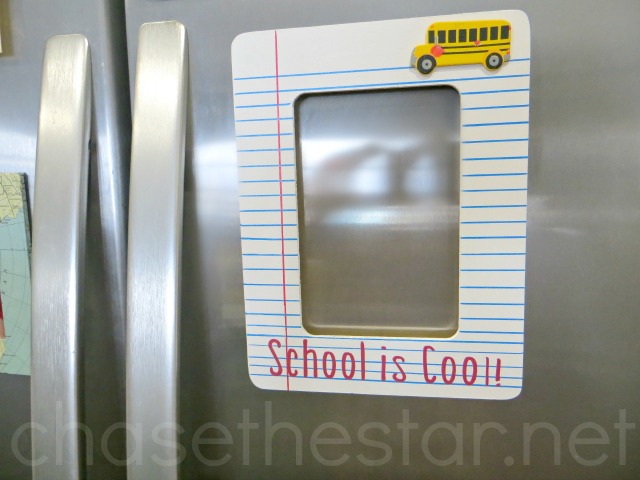
Such a simple project! Make a Notebook Frame to hang on your fridge or anywhere you like:
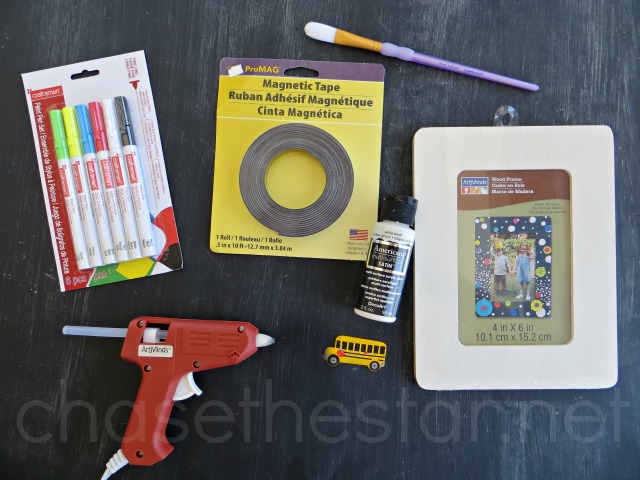
Materials:
I shopped at Michaels for all of my materials!
Ready to paint 4×6 wood frame
White acrylic paint (I used Americana in White Birch)
Paint pens (I used Craft Smart in red and blue)
Magnetic Tape
Paint brush
Wood appliques
Glue gun/glue stick
Level or ruler
Optional: Use your cutting machine (I love my Cricut Explore) to cut out adhesive vinyl lettering!
Directions:
Paint the frame white and allow it to dry completely.
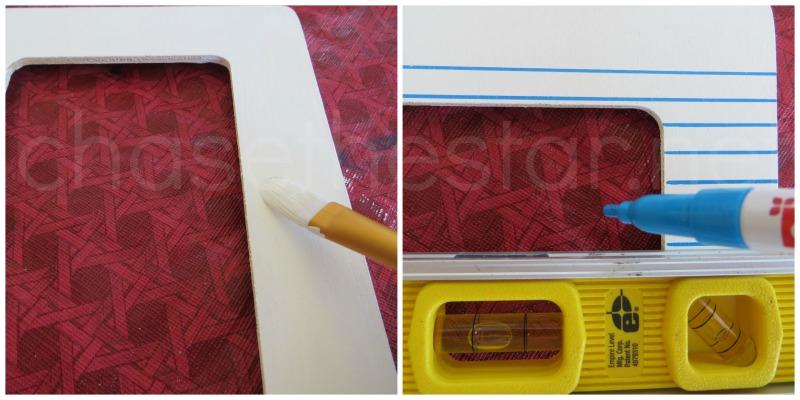
- Using your level or ruler, start about an inch down from the top of the frame, and add blue lines like you’d find on a piece of notebook paper about 1/4″ apart.
- Make a vertical line in red about an inch from the left ‘margin’, all the day down the frame.
- Glue the wood applique to the top right corner of the frame (I found a cute school bus shape at Michaels).
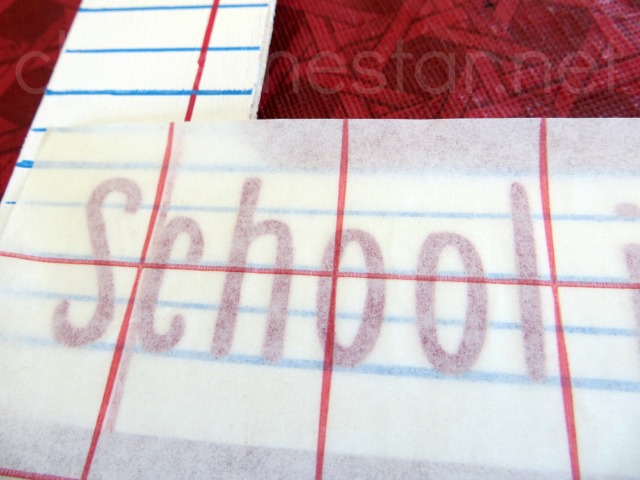
- If you choose to add wording to the bottom then cut the vinyl out in your cutter (seriously the Cricut Explore is just AWESOME). Choose your font and cut it out (for a tutorial on how to use a vinyl cutter click here).
- Place your wording on to the bottom of the frame. I used “School Is Cool”, in hopes that my kids get the message..ahem!
Add a strip of adhesive magnetic tape to the top and bottom of the back of the frame, and hang it on your fridge!
SWEEPSTAKES
Told ya it was easy! You can make this too, Michaels is offering YOU the chance to win a $50 gift card (swoon!)! All you need to do is create your own back-to-school project and upload a photo to your Instagram using the #Create2Educate and #sweepstakes hashtags beforeAugust 15 for a chance to win a $50 Michaels gift card – one winner will be chosen each day!!!!
*If you don’t have an Instagram, you can simply submit your photo via www.michaels.com/
Don’t forget to enter, you know $50 can go reallllly far at Michaels! Good luck!
So what do you think?? Will you be copy-catting my Back to School Notebook Frame for your entry?
What other Back to School craft ideas are you working on?
#Create2Educate #MichaelsMakers
{Affiliate link}

tisa@justmylittlemess says
this is such a great idea! thanks for sharing!