Hey friends!
I’ve spent the last couple of weeks working on several furniture pieces for a client. She’s moving into a new place and has asked me to update a T.V. stand, an armoire, and an old door (to be turned into a headboard—stay tuned for those) for a fresh look in her new bedroom.
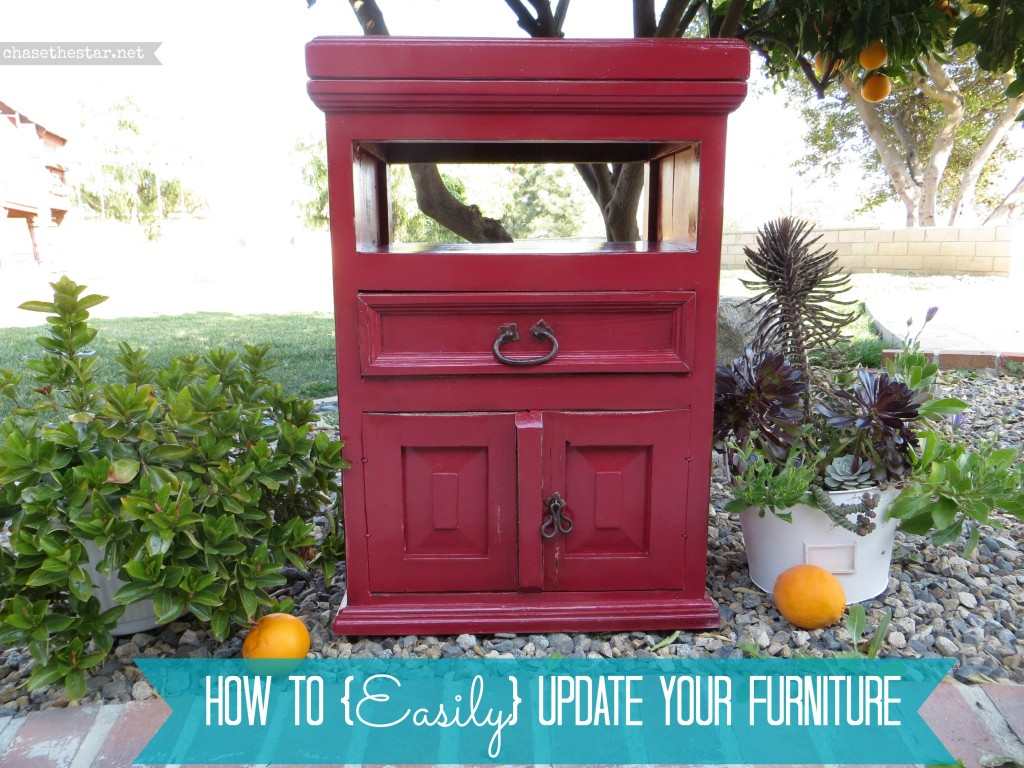
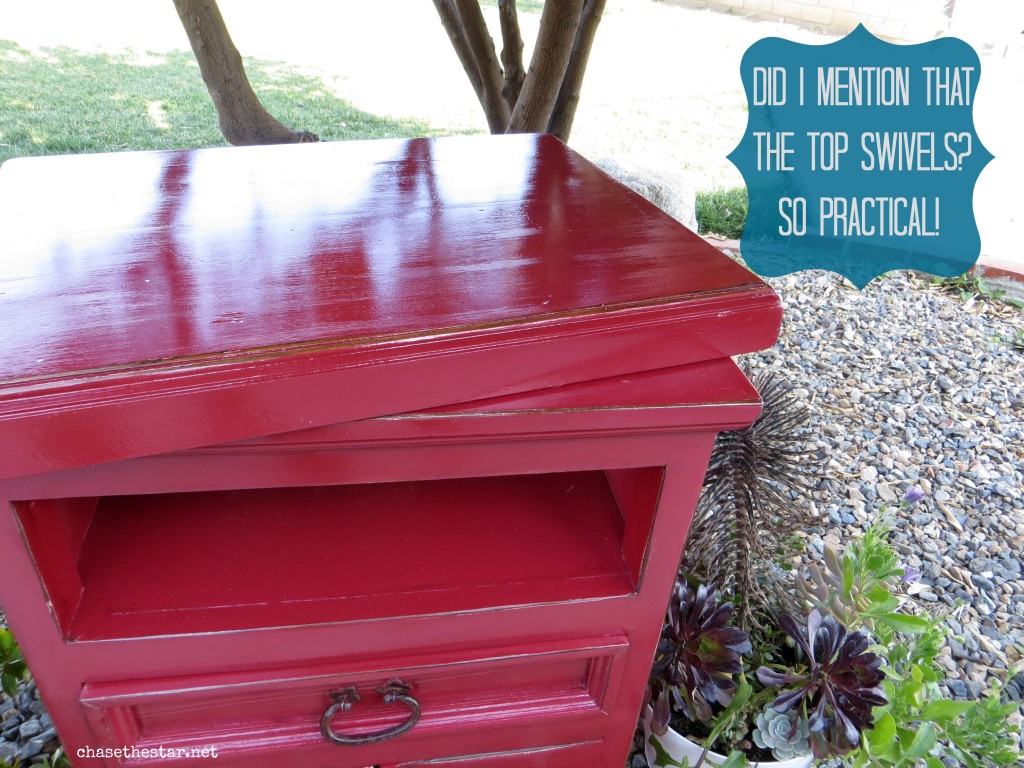
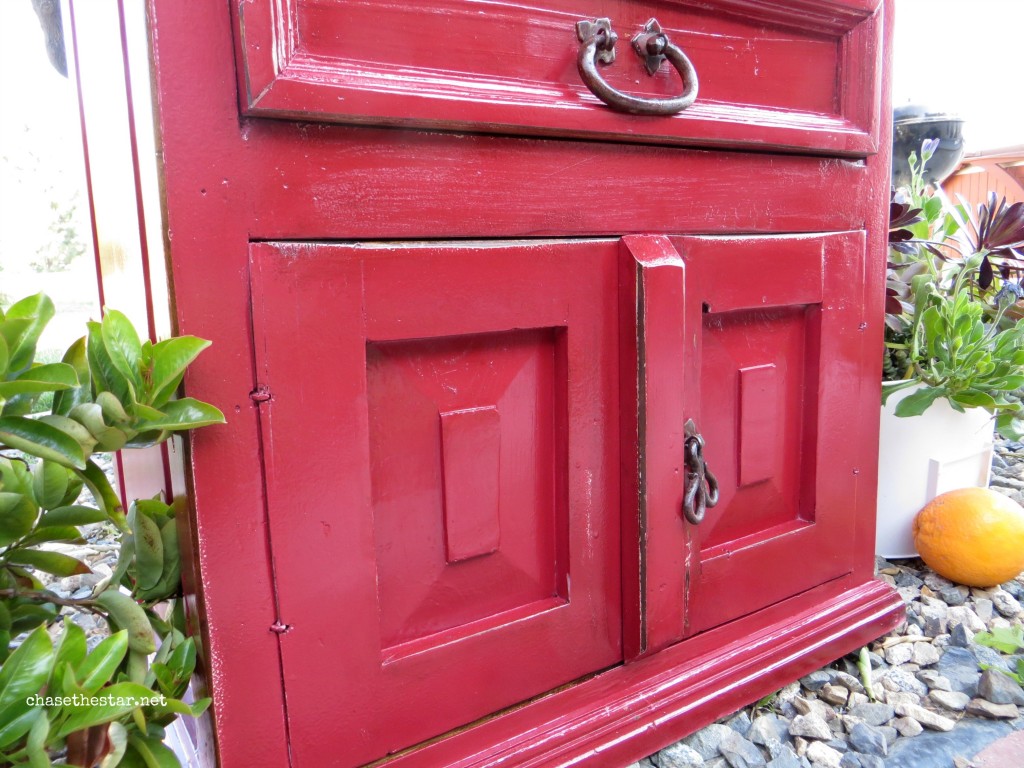
The first piece I worked on was this old rustic T.V. stand.
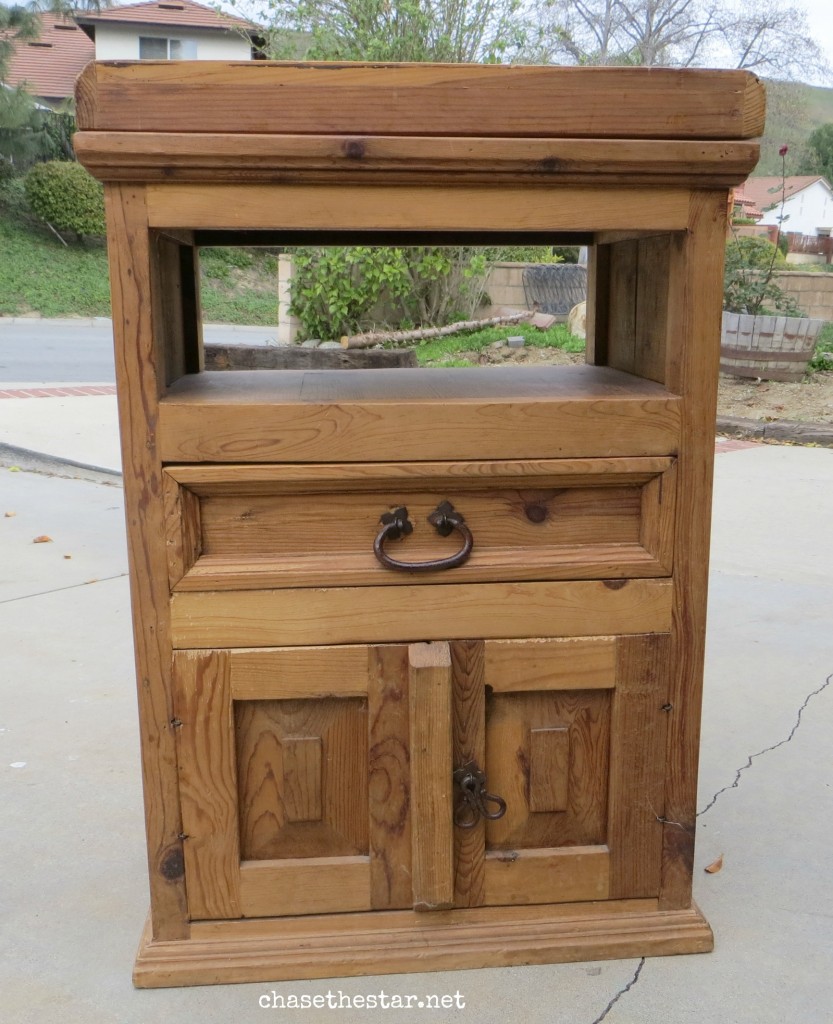
I actually like it in its original state—rustic Mexican style, with wrought iron nailed in hardware.
She wanted to change the T.V. stand up by painting it red and making it a focal piece in her bedroom which will otherwise house various stained pieces.
The best part of this furniture makeover is that there was very little sanding involved. Although the piece is very ‘husky’ and large, the wood has a very light layer of stain without a top coat (sealer), it’s just a matter of dulling it a little bit, priming, painting, sealing, and then patting yourself on the back as you admire the fruits of your (light) labor.
Let’s start with step one…
How to {Easily} Update Furniture
Materials:
Orbital Sander & discs (150 grit+)
Primer
Foam Brush
Spray Paint
Polyurethane
Step {1}
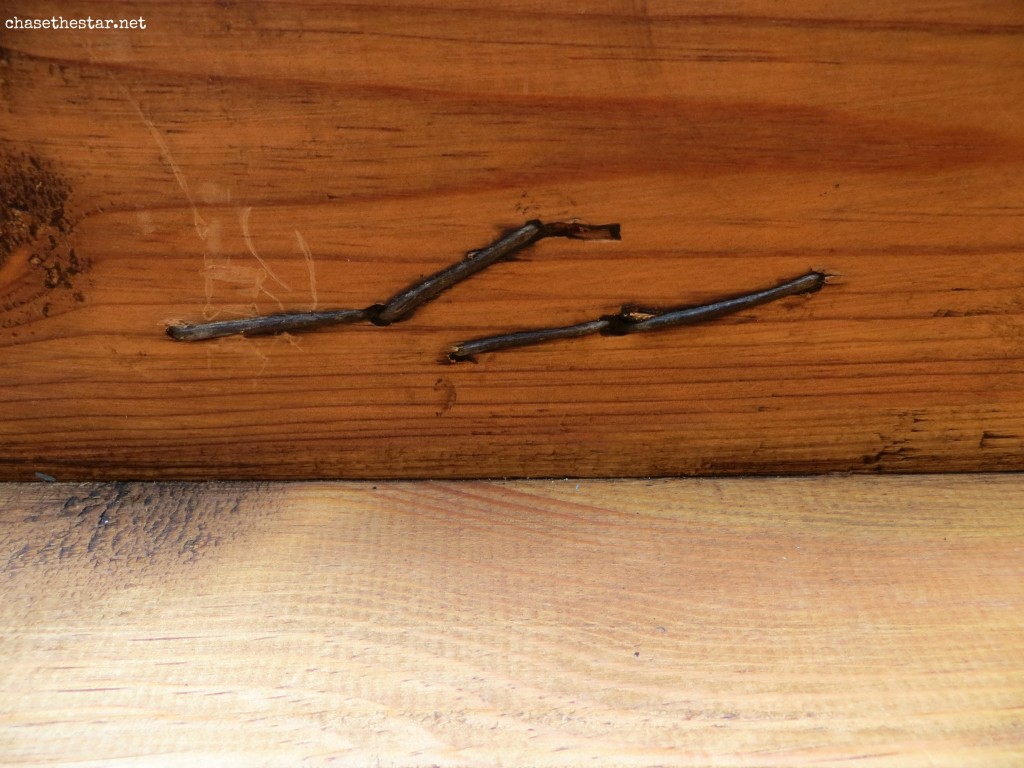
‘Step 1’ is always to remove the hardware. The problem with this piece is that this is the hardest ‘hardware’ I’ve ever seen. Ever! It’s nailed ‘in’ to the wood, and without the proper tools it’s impossible to remove. So I worked with it—covered it up with painters tape and decided to take my chances and paint around it.
{NOTE: If you’re using spray paint, make sure to tape off any sections you don’t want painted. For large areas such as the inside of the cabinet and drawer, I spread out some newspaper and secured it with painters tape}
Step {2}
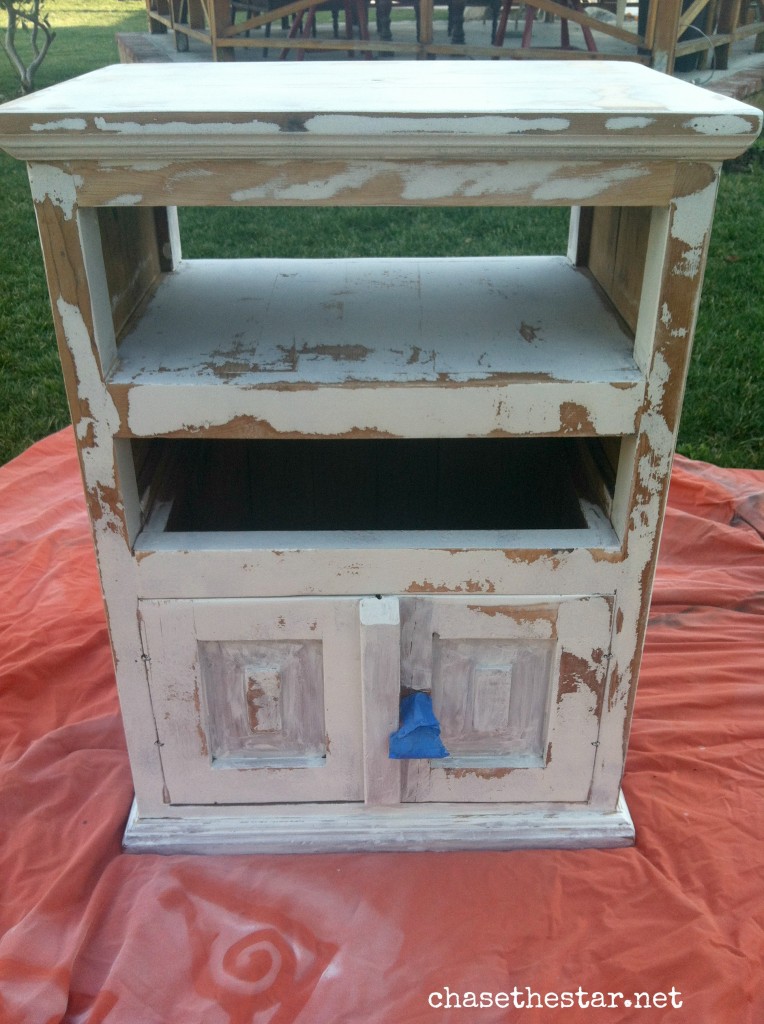
Preparing for Paint: I went over the entire piece with my orbital sander and a 150 grit disc. This was quick (a few minutes)..just enough to dull it down a bit. With a foam brush I added a coat of primer and once it dried, I went over it with the sander sparingly to smooth out the bubbles and bumps that the primer left behind (typical for brush on primer).
Step {3}
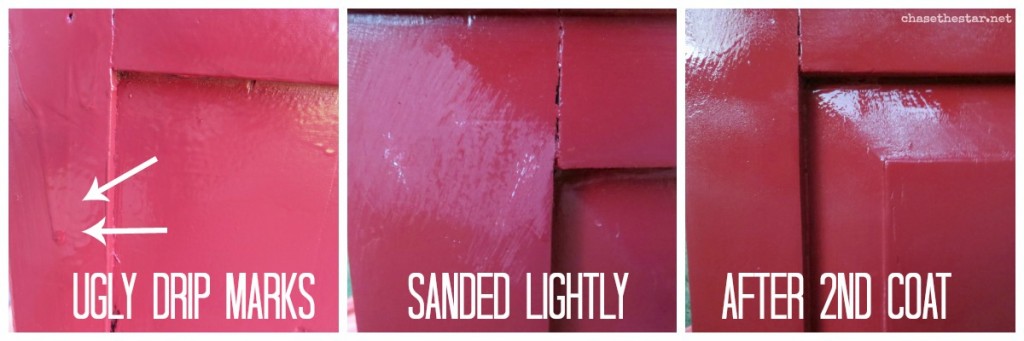
Paint it! I sprayed two coats of this pretty shade of red (Rustoleum), allowing some time to dry between coats. Also in between coats, I went back to inspect the drip marks that spray paint unfortunately leaves behind at times. With a high grit sand paper (150+) I went over each ‘drip’ lightly, wiped off the dust, and proceeded with the second coat.
Step {4}
Distress and Age it! This is optional of course, but with this piece I just couldn’t resist! Using the sander, I went over the edges lightly to remove just enough paint to expose the fresh wood underneath. I took a the corner of a paper towel and dipped it into a can of stain (dark walnut), and went over the exposed wood, immediately wiping it off with the clean part of the paper towel. See this method in action here.
Step {5}
Protect your work: I added a coat of polyurethane (I like a satin finish), and let it dry overnight. The next morning I removed the tape from the hardware, and patted myself on the back for a job well done!
Why buy new furniture when you can easily update the pieces you already have?
Do you have plans for any furniture makeovers?

Linking up here &


Linda says
I love this. I did the same thing to a white oak finished tv stand. I made mine red too. Great minds!! We’re having a party at Tumbleweed Contessa – What’d You Do This Weekend? This would be a great hit! Hope you can join us. http://www.tumbleweedcontessa.com/blog/whatd-you-do-this-weekend-6/
Thanks for the great pictures and sharing.
linda
Barbara @ Chase the Star says
Thanks Linda! I’ll check out your party! :)
Tara says
LOVE it Barbara! THANK you for showing that drip marks happen because I keep getting them & thought it was just me <3
Tanya says
Gorgeous redo Barbara!
xo, Tanya
Barbara @ Chase the Star says
Thanks friend!
Lauren says
What an improvement! I love the final look. I do have some future makeover plans, but I’m just putting it off. My dad and I are going to repaint a little rocking chair I’ve had since I was a little girl – nothing major, just freshening it up. I think it will give me some good practice, though.
I’d be thrilled if you’d link up at this week’s Off the Hook!
Carrie - Worth Pinning says
Looks soooo much better!
Marilyn Sue Designs says
This is such a BEAUTIFUL revamp! Someone else might have seen this piece at Goodwill and never looked back… very inspiring!!
Barbara @ Chase the Star says
Thank you very much!! You are so kind:)
Dinah says
Great job on this! I love the red! It looks great!
Barbara @ Chase the Star says
Thanks Dinah!! She chose a great color!
Sarah @ Becoming Martha says
Love it B! The color is awesome ;)
Barbara @ Chase the Star says
Thanks Sarah! She chose a great color!!
Marilyn says
This is gorgeous, Barbara!
Heather says
Love the rich color Barabara – great makeover!
Barbara @ Chase the Star says
Thanks Heather! That color really made this piece shine!
Melanie says
This red is PERFECT for a living room table I’ve been needing to redo. What is the exact color name? Thanks, it’s beautiful!
Barbara @ Chase the Star says
Melanie, thanks! Honestly there is no actual color name..weird right?! It’s just the Rustoleum brand and the deepest shade of red they have (judging by the cap color). Got it at Lowe’s…sorry wish I could be of more help but they don’t name their colors!