Spring is here, so it’s time to spruce up the place a bit. I do need to get to my spring cleaning, but first I’d like to start by taking care of the little things that need tending to around the house. Our entry way could use some help.
Chalk Transfer Method {and Starting the Entry Way Makeover}
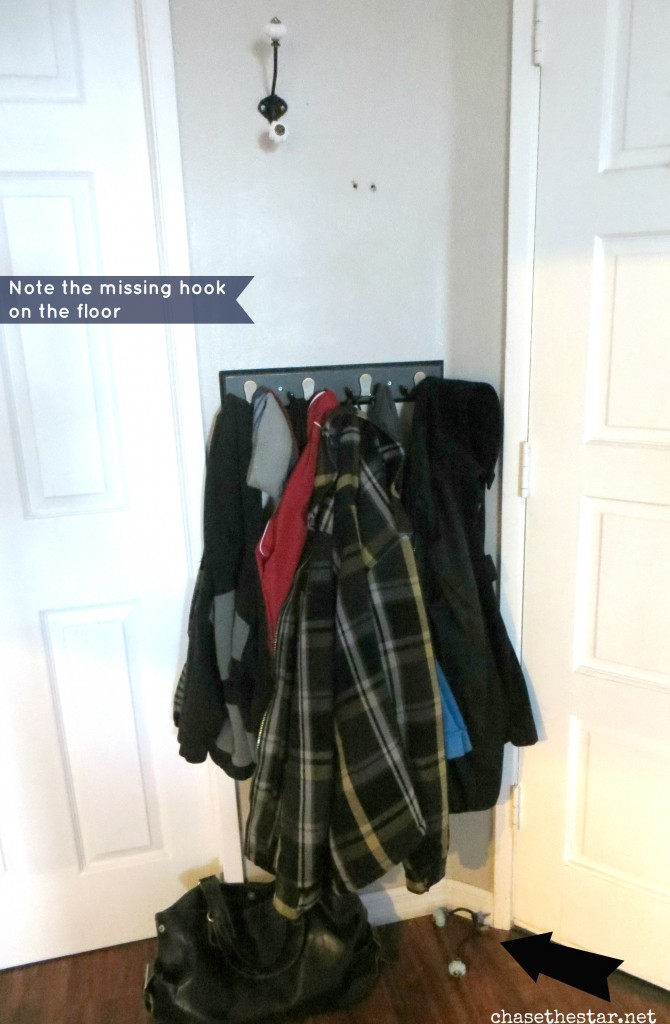
My house has a fairly good size foyer, but it’s sort of an awkward shape so the coat hooks are tucked behind the front door, and right next to another door that leads to another room. It’s about 3.5 feet wide total. Small space for an active family of 5.
I set out to update the entry way wall…I’ll admit I’m still working on it, but so far I’ve made a little progress. Not so much in function, but in decor and for me, that’s good enough!
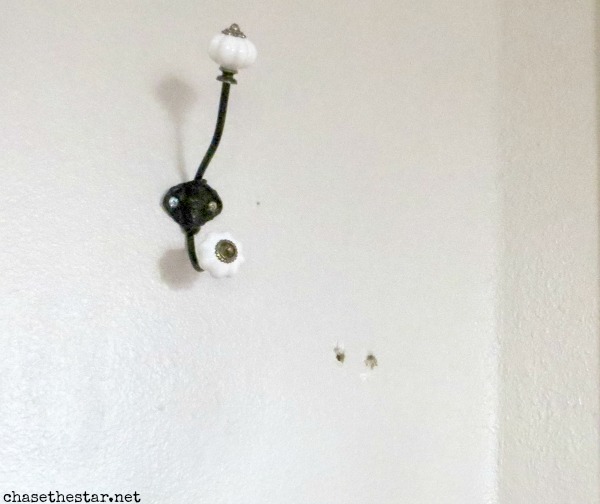
First thing I took care of was the unsightly holes the old hooks have left behind. Apparently you need to drill in to a stud if you want the hook to hold any actual weight. Whatev, it looked good there so that’s why I put it there. Lesson learned. The hook fell a few days ago, tonnage of coats hanging from it and all.
All I had to do here is fill those holes in with spackle and paint over it.
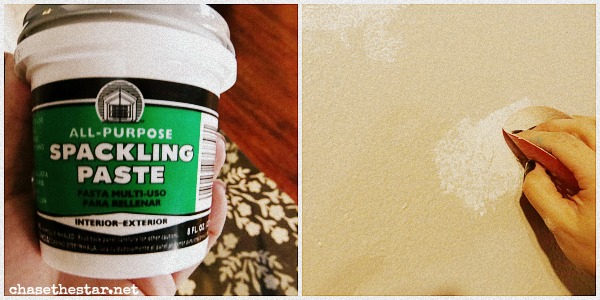
The holes were pretty deep so I put a thick clump of spackling paste over it, and smoothed it out with a scraper, and let it dry. Then I went over it lightly with a little sandpaper to make it smooth.
Lastly, I painted the section using a brush and some leftover paint (Wheat Bread by Behr).
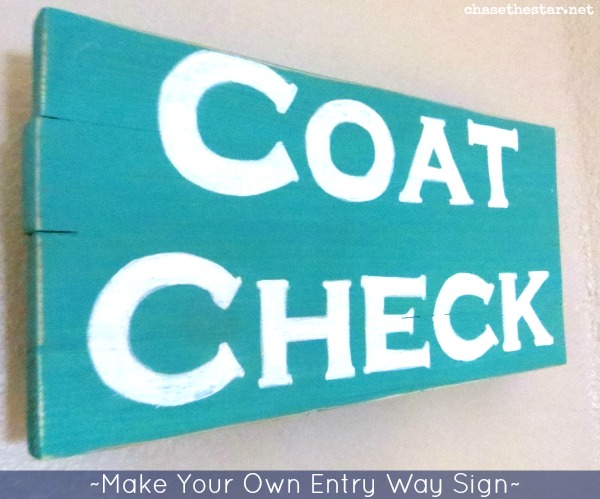
Now to the fun part! I made a little ‘Coat Check’ sign to add some interest and fun to this little space (which is caddy corner to where my Vintage Window sits).
If you want to make something similar you’ll need:
{4} 12′” wood slats
{2} 6″ wood slats
{1} 4″ wood slat
Nails/Hammer
Drill
Wood glue
Paint/brush
Clamp
Chalk
Paint Pen
Pencil
Step 1: Assemble the Sign
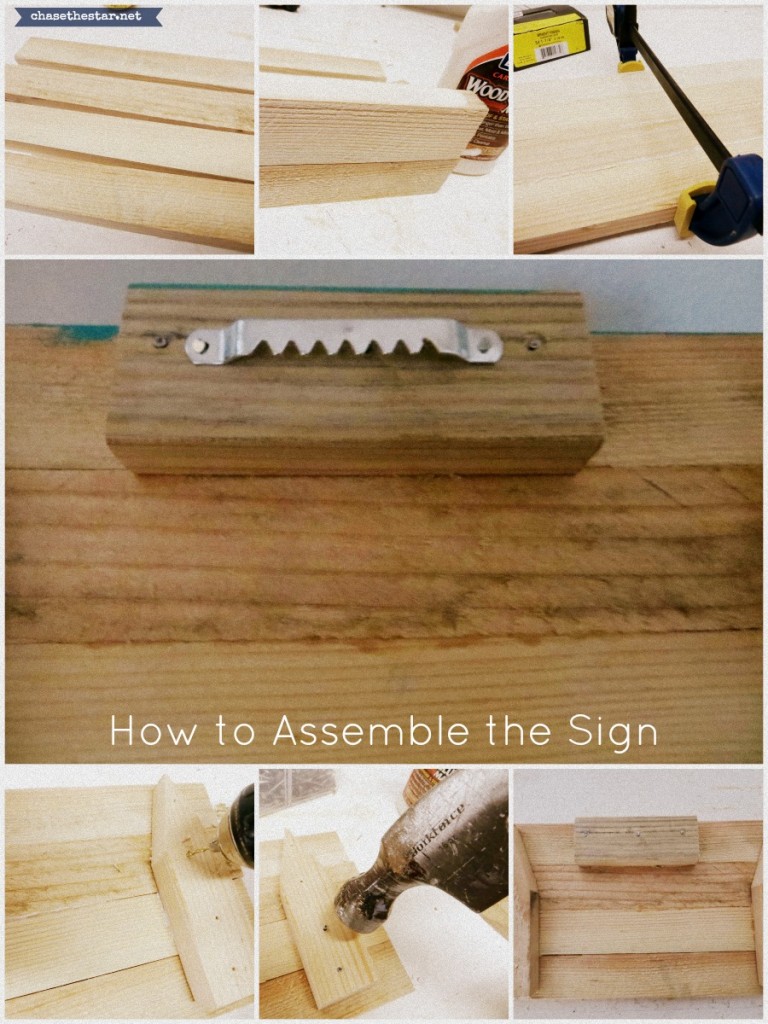
Clockwise from the top:
Get your wood slats together (these are garden stakes leftover from another project). Glue the slats together, and with a clamp, hold them together for about 30 minutes (make sure to wipe off any excess glue quickly).
Glue shorter slats vertically to the back (one on each side). With a drill and the skinniest drill bit (I’m so technical, I know), drill hole through the vertical slats, and hammer a nail in to each hole. Use a smaller piece of wood for the top center, to hold your hanging hardware.
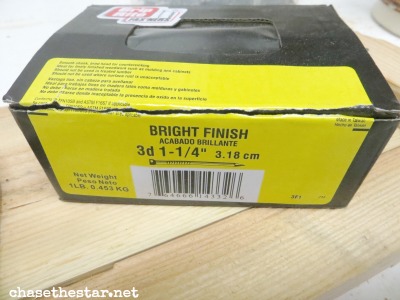
These are the nails I used:
Middle:
Add the hanging hardware to the top piece (the 4″ wood slat).
Turn it over, and paint it in your desired color, allowing the piece to dry.
Step 2: Adding the Wording
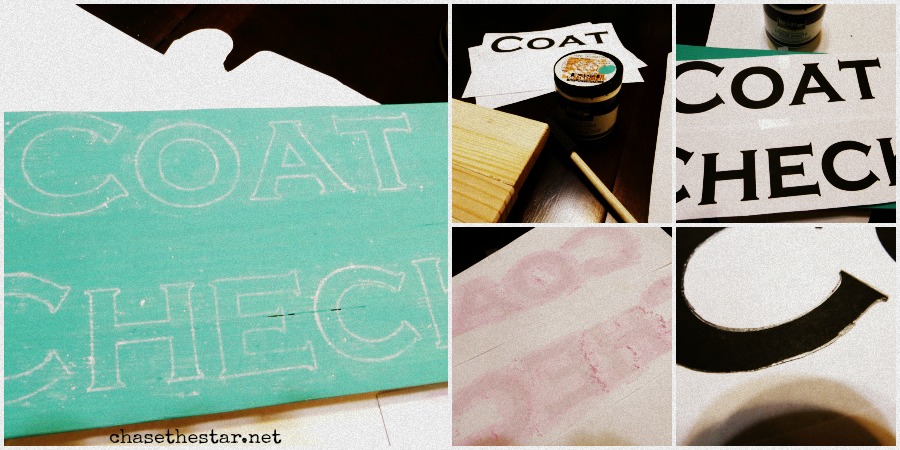
I used the same chalk transfer method as here
Smaller pics; Clockwise from the top:
Print out your desired phrase
Tape the words together like you’d like them to show on the sign.
Turn the paper over and cover the wording in chalk (you should be able to see it through the paper).
Turn the paper back to right side up, and place it on the wood. Using a pencil trace the printed letters.
Large Pic:
The chalk should transfer the wording directly on to your piece!
Wipe the excess chalk off and fill in the words with a paint pen.
I distressed the sign to go with the rest of my decor, simply by going over the whole thing lightly with fine grit sandpaper.
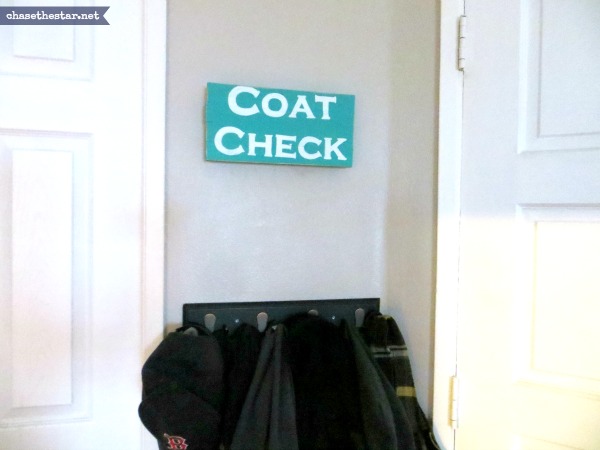
I’m still working on something for that empty space between the sign and the coat hooks. So far I see progress, and progress is good!
Linking up here and:


Raquel @ Organized Island says
That looks great Barbara! You make it look so easy! I love the new look of your blog too! :) Happy Blogversary!
Barbara @ Chase the Star says
Thanks friend!! I so appreciate you stopping by!! XO Hope you entered the big Blogiversary Giveaway!
Crystal says
Love the sign!!! The color & lettering is great! You did good!!
Meegan says
What a great idea Barbara!! Pinning!!
Jill @ Create.Craft.Love. says
So cute, friend!!
Laura@live-love-scrap says
Darling sign! Love the color!
Barbara @ Chase the Star says
I appreciate that Laura, thanks!
kristi@ishouldbemoppingthefloor says
This is so super cute. What a great method. Thanks for sharing!! :)
Barbara @ Chase the Star says
Thanks for the love Kristi!
Chelsea @ Making Home Base says
Super cute, friend – love love love this!
Barbara @ Chase the Star says
Thank you friend!! You’re so sweet:)
Stacey says
So stinkin’ cute! Love it! Thanks for sharing!
Stacey of Embracing Change
gail says
fabulous transfer method Barbara! Can’t wait to see what you do in the middle…
gail