Hello my friends! Done any good second hand shopping lately?
I did a little thrift store shopping a few weeks ago (shocking, I know) and came across a fabulous piece that I could.not.pass.up.
I just had to have it.
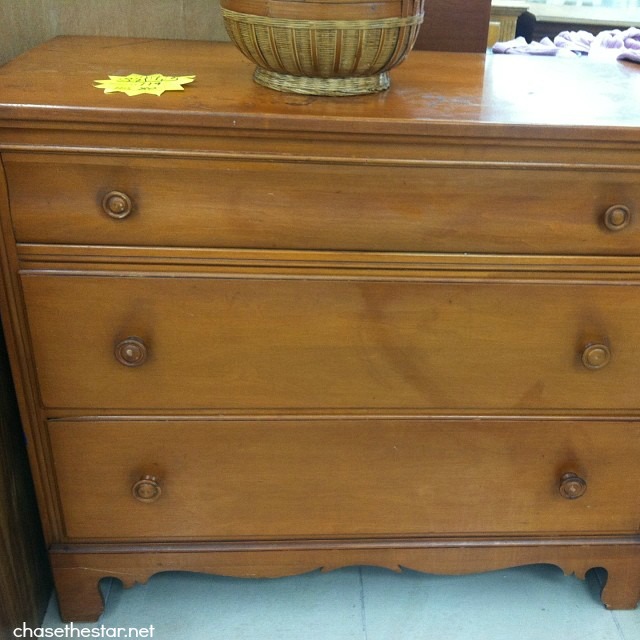
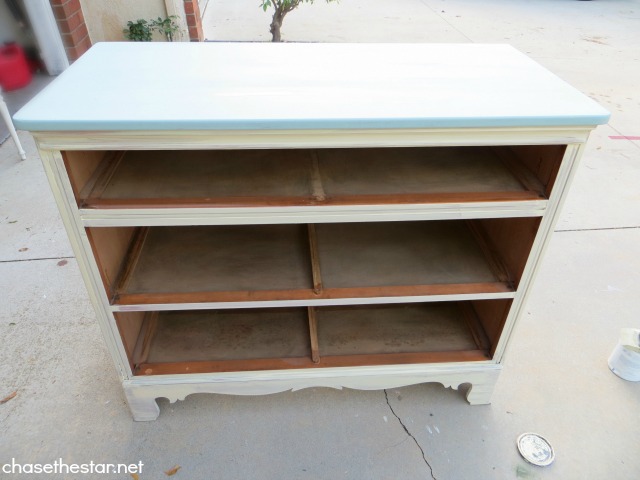
This 3 drawer dresser is solid wood, has removable compartments in the drawers and had just about zero damage. Not to mention it was a steal at just $40! It’s a great size for what I had in mind at 35″ in height, and 42″ wide.
I brought it home and got started on it right away.
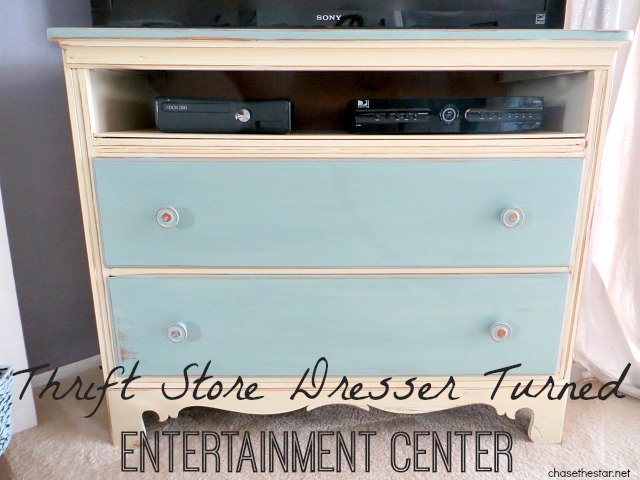
Thrift Store Dresser Turned Entertainment Center
I removed the top drawer and set it aside. I also took the center strip of wood that the drawer sits on.
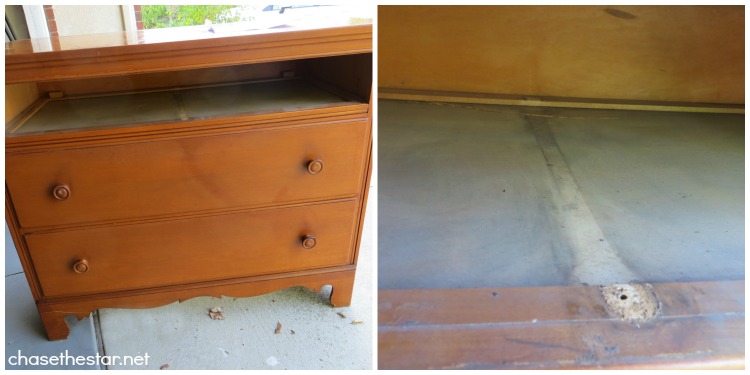
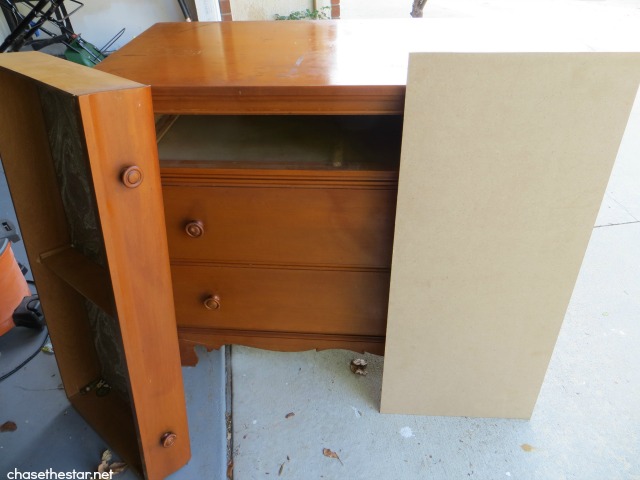
I decided to turn it in to an entertainment center by removing the top drawer and making that space capable of holding our electronics. In order to even the space out I bought a piece of MDF at Home Depot and had them cut it to size for me.
Next, using the orbital sander I lightly sanded the top of the dresser to remove a couple of ring marks (about 2 minutes of work).
After wiping it down, I vacuumed inside the drawers to get rid of the dust.
Then I got to painting!
I cannot stress enough how highly I recommend to use Chalk Paint® for any furniture project. I refuse to strip stain or paint off of anything anymore!

I painted the entire thing including the piece of MDF in under an hour. Two coats. Oh yeah, I ain’t messin’ around! I still had some of the Cream and Duck Egg I used in these painted frames, and painted kitchen island projects which I love, so I went with those colors.
I hand sanded the entire piece, focusing mostly on the edges, to give it a distressed and worn look.
Lastly, I added a light coat of polyurenthane in a satin finish.
The MDF piece was just placed in the space. I could’ve nailed it in, but realized it wasn’t necessary since our electronics would be holding it down, but you can definitely do that for added stability if you are working on a similar project.
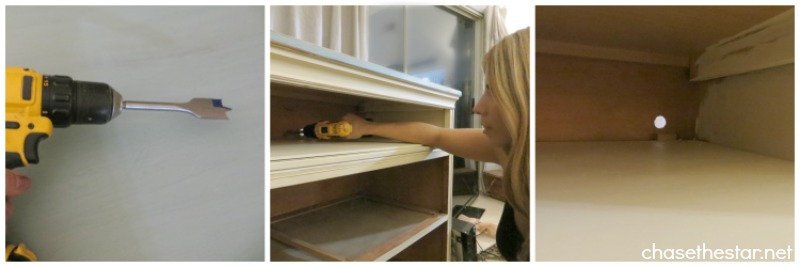
In order to get the electronics to plug into the outlet without a mangled cable mess, I made several holes to the back of the dresser from the inside, using a 1 1/4 inch saw drill bit. Then just ran the cables through and plugged the electronics into the outlet on the wall.
The dresser has so much detail on it (especially the bottom) that just ‘pops’ after a nice coat of paint. I had in mind to change the knobs but at the last minute decided to keep the original knobs, paint them, and give them a little distressing as well.

I took this pic a couple of weeks ago when I still had my mantel decorated for fall…
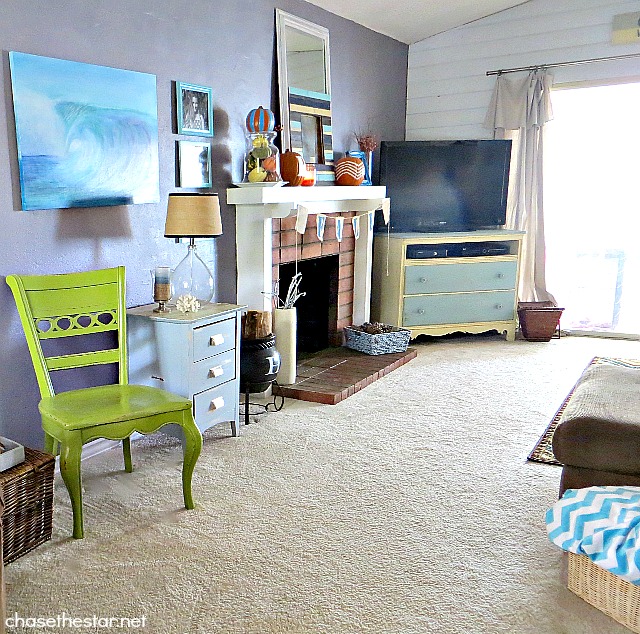
This one is officially my favorite project so far. Especially since it took just 3 hours from start to finish!
Have you repurposed any second hand items lately?
Come back tomorrow to check out my easy to put together Christmas mantel (as if I would ever do it any other way)!
Javy says
Barbie this is so awesome! I’m so happy for you, hey that dresser at the top, I was thinking you know what would look cool too.. if you can find a stained glass like the tiffany lamps or have someone make a piece for that size and put the drawer back but take out the front piece of wood and replace it with stained glass. It will add even more character to the piece…. just giving you some input for maybe even another project you do.. You ROCK!!! great job!!
your friend,
Javy
Barbara @ Chase the Star says
Thanks Javy! I love your stained glass idea!
Emily says
This inspires me to try the chalkboard paint on my laminate ikea dresser. Thanks so much for all your great ideas!
Barbara @ Chase the Star says
Thank you Emily! Chalkboard paint on laminate is awesome!!