This post is #sponsored by Martha Stewart Decoupage, all opinions are my own.
So while you all partied for Labor Day this weekend, I got my craft on with Martha Stewart Decoupage!

I updated this cute little tote bag that held a towel and sunscreen at my son’s preschool this summer on pool days. Now that summer is unofficially over, I’m starting to go through our closets to get ready for cooler weather (hopefully coming soon). He’s definitely outgrown this bag so it was great for my project.
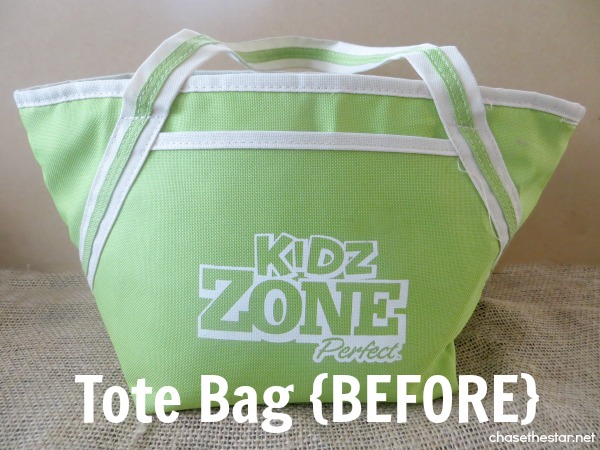
The line of Martha Stewart Decoupage products is perfect to get that little tote bag from boy-ish to suitable for Mom!
It’s a hand me ‘up’, if you will!
I have never decoupaged onto fabric before, so I was a bit nervous, but guess what? It was just as easy as decoupaging any other surface, and just as fast! Do you have fabric you’d like to decoupage? Here’s how I did it:
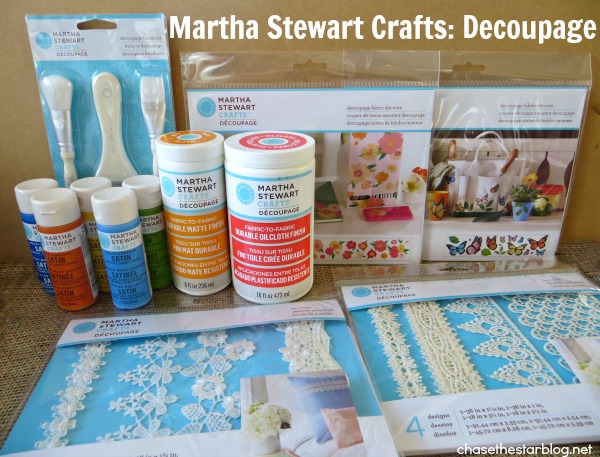
Materials:
From the Martha Stewart Line:
Decoupage Fabric Die Cuts
Satin Paint {Optional}
Fabric to Fabric Decoupage-Matte Finish
Fabric to Fabric Durable Oil Cloth Finish
Soft Brushes
Update a Tote Bag With Martha Stewart Decoupage:
Step 1:
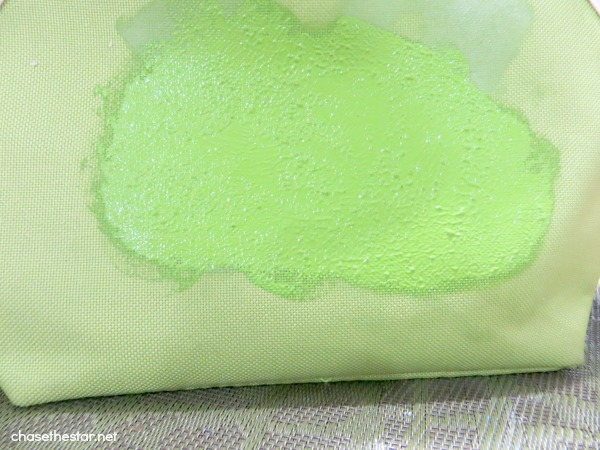
Because my tote had a white logo on it, I added a coat of acrylic fabric safe paint in the closest color to match it, and let it dry.
Step 2:
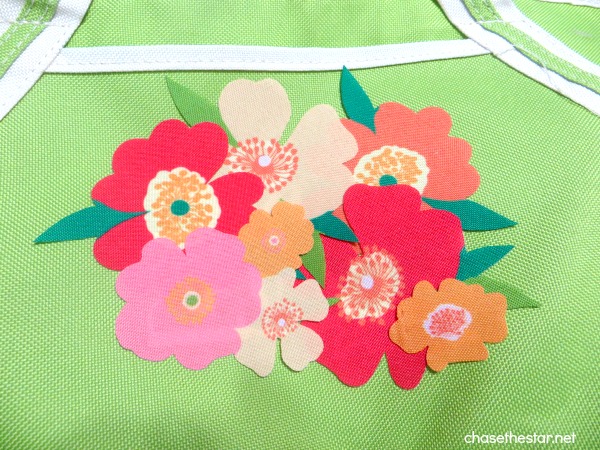
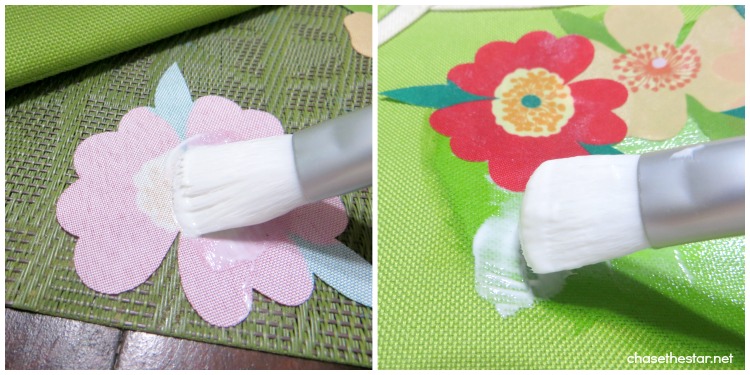
I choose my die cut fabrics and arranged them in the way I want them to look.
Step 3:
Next, I applied a small amount of the decoupage onto the die cut directly, and then onto the surface of the bag, smoothing out the fabric with my fingers to make sure to remove any air bubbles or streaks. Then I allowed it to dry for about an hour.
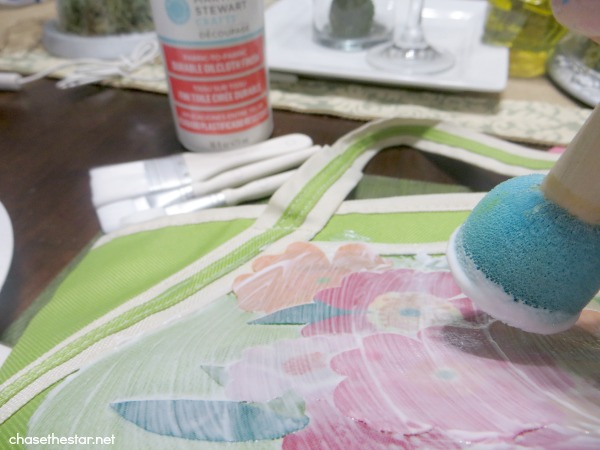
Step 4:
Lastly, I applied a couple of coats of the Oilcloth Finish with a sponge applicator, as directed on the package.
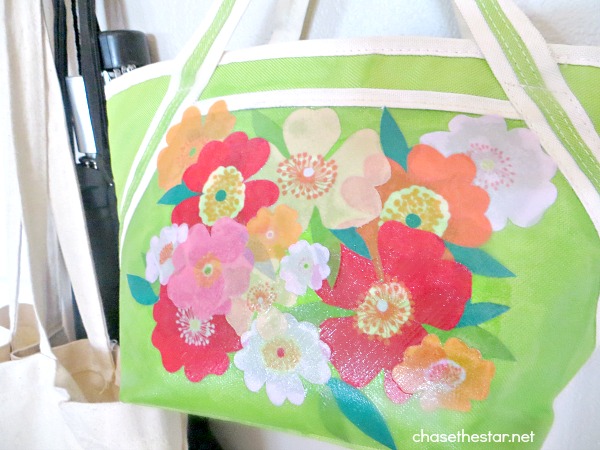
I let it dry overnight, and the next morning my bag was ready to use!
I think this will be the tote I use when I collect branches and pine cones with the kids as we transition into Fall.
I love the fabric die cuts from the Martha Stewart Decoupage line! Best of all the formulas are durable, and even dish washer safe (next project: glass coasters!). The oil cloth finish makes it so that I can wipe any grime off easily, and it can withstand damp weather. There are so many materials available too–fabric, paper, trims, lace, and more. Check out the entire line at Michael’s {that’s where I shop for my crafty stuff}!
If you want more info on Martha Stewart Decoupage visit Plaid (they make the Martha Stewart line) on facebook, Twitter, and Pinterest, and check out their blog!
What’s been your experience with decoupaging fabric? Have you ever used decoupage on clothing?
Crystal says
It turned out beautiful!! I love the flowers on the green! What a great idea to repurpose a bag!! Thanks for the tutorial!!
Meegan says
This looks amazing! I seriously just saw something VERY similar at Dillards the other day. It was $89. Crazy!
Thanks for sharing the great new line from Martha Stewart!
Laura says
This is so pretty! What a great idea -love that you took that bag and totally revamped it!
Barbara @ Chase the Star says
Thanks Laura! So easy to do!
Ashley @ Simply Designing says
Cute bag!!!
Barbara @ Chase the Star says
Thanks Ash! Appreciate it!
Alice says
Pretty- and kind of looks like glitter. Did the finish stiffen the original fabric very much?
Barbara @ Chase the Star says
Not really!
Alice says
Cool. Thanks -Although maybe weird, I thought it might be fun to paint the finish on a garment :-)
Barbara @ Chase the Star says
Not weird at all Alice! I think you can do that too, just be sure to seal it once the paint is dry. Love that idea!